On January 14, 2020, Microsoft officially ended all Windows 7 support. This puts this still much-loved operating system in the same box with Windows XP and means that you should seriously consider moving to Windows 10, a newer, regularly updated OS.
Why You Should Migrate to Windows 10
Microsoft’s End of Life announcement doesn’t exactly mean that you should stop using Windows 7. However, you should think carefully before you decide to stick with it. As of this month, there will be no more bug fixes, security patches or new functionality. While the new functionality bit is desired but not exactly vital, the lack of security patches makes all Windows 7 users significantly more vulnerable to malware attacks. With new malware released every day, this is a very real threat, especially if your business computers are still running Windows 7. Remember the huge WannaCry attack back in 2017? Well, Windows 7 was the operating system most affected by it. Without security patches, your computer will be extremely vulnerable to all similar new attacks.
In addition to the increased security risk, keeping using Windows 7 will result in additional problems such as:
- Discontinued software updates
- Limited functionality compared to Windows 10
- Compatibility issues
- End of technical support for any issues
As you can see, it’s in your best interest to either upgrade your Windows or get a new Windows 10 device (make sure you follow these 5 steps before you start the migration).
But what to do with all your files, settings, software and your whole setup that you’re so used to? A brand new Windows 10 PC won’t have any of that installed. Enter FastMove, the easiest to use Windows 7 to Windows data migration software.
How to Move Your Data from Windows 7 to Windows 10 with FastMove
What if you could use an easy to use and lightweight app to transfer everything from your Windows 7 PC to your new Windows 10 system? Well, FastMove does exactly that. With its help, you can transfer users, settings, software, drivers, and files and folders in just a couple of clicks. The best bit is that FastMove is a data migration tool for Windows 7, 8 and Windows 10 (32-bit and 64-bit systems). Let’s say you have a 32-bit Windows 7 laptop and want to move everything to a new 64-bit Windows 10 PC – no problem, FastMove will do that.
Let me show you how it works.
First of all, download FastMove and then install it on both computers, the old one and the new one.
Once it’s installed, open FastMove on your old PC. This is what it will look like:
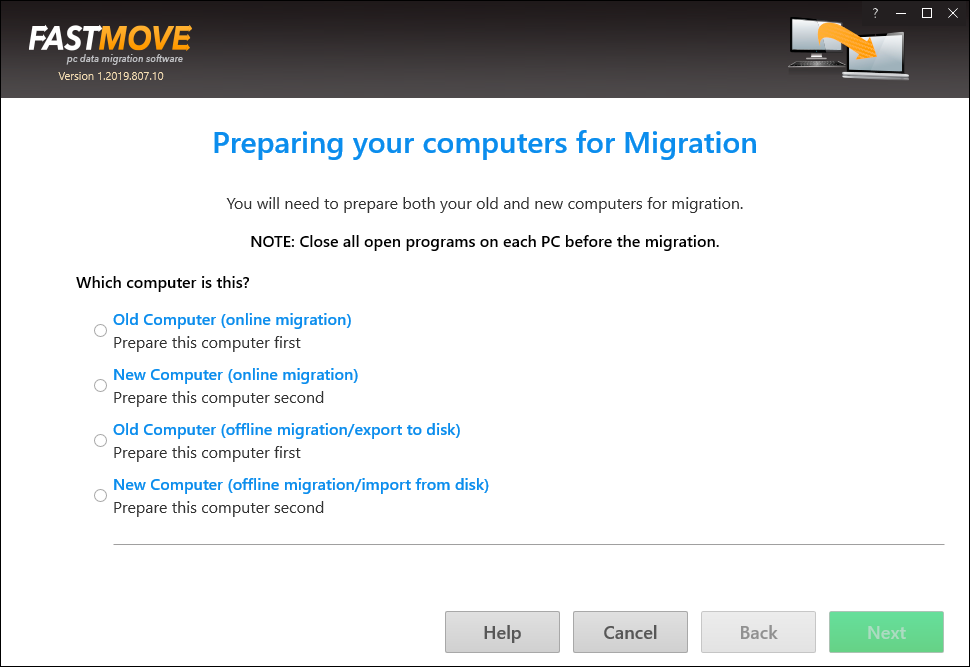
Select “Old Computer” and choose how you’d like to migrate data, over a network or offline using an external hard drive. If you choose “Online migration”, you’ll get this screen:
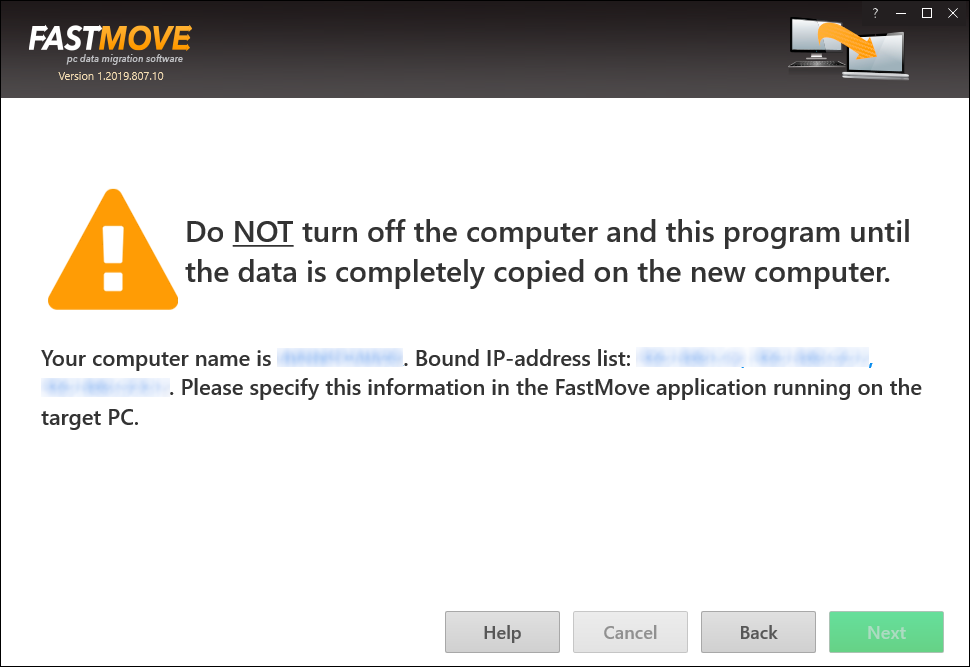
The information from this screen will help you to connect FastMove to your new computer.
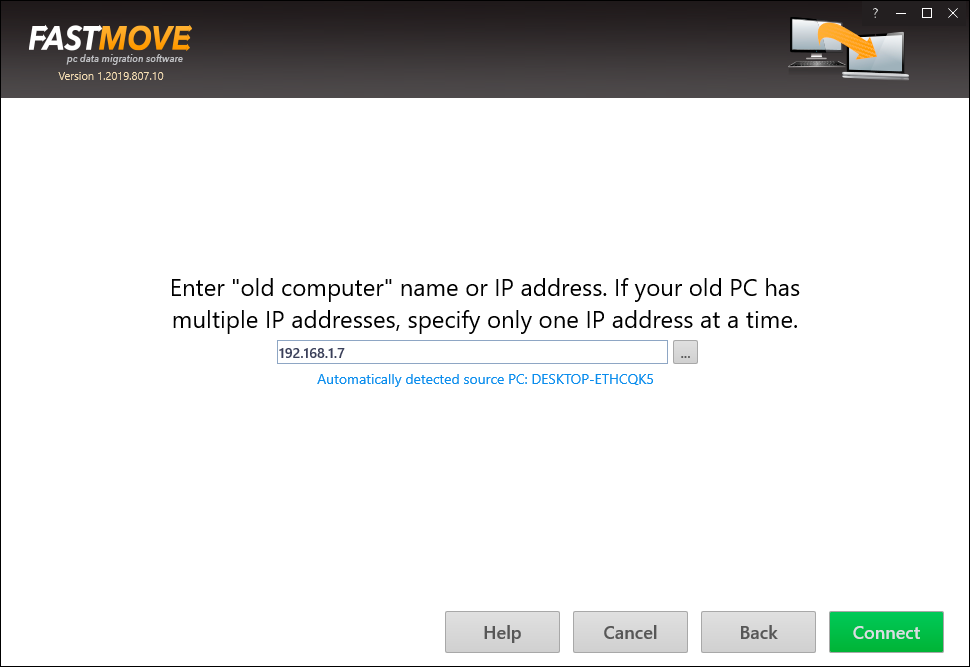
Now go to the new PC, open FastMove and select “New Computer”, then choose the type of migration you’re doing. If you select “Online migration”, you’ll get this screen if FastMove identifies the source PC automatically (most of the times it will do that):
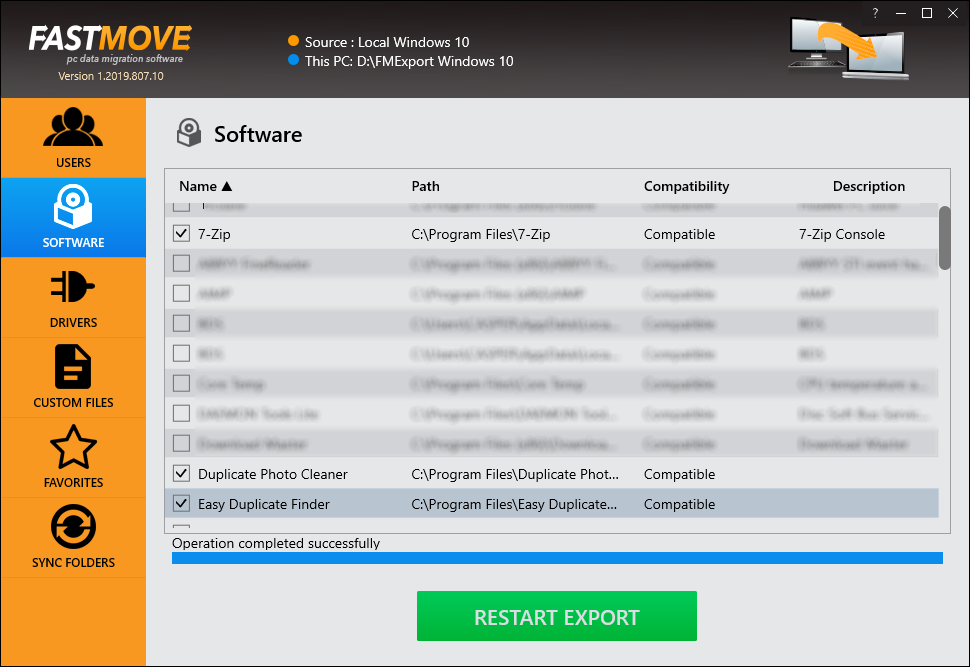
When both computers are set up, FastMove’s main interface will open on both PCs:
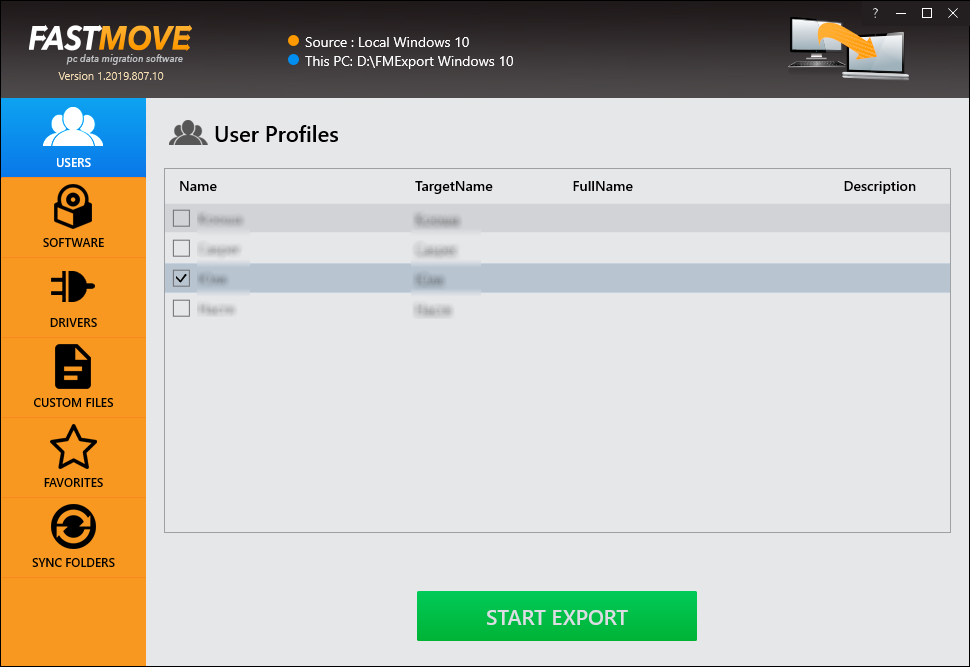
Now you can begin transferring data from Windows 7 to Windows 10! It’s really easy – all you need to do is select what you want to transfer (users, software, drivers, custom files, favorites, or sync folders locally and remotely), and follow FastMove’s prompts. The app will transfer all compatible software, drivers and settings, so you don’t need to worry about any compatibility issues.
When you’re ready, grab yourself a cup of coffee and let FastMove do the job. No further action is needed on your part.
As you can see, transferring from Windows 7 to Windows 10 using FastMove data migration tool is very easy.
For more information about FastMove, visit this page.